Friday, May 14, 2010

Daring Cooks' May Challenge: Enchiladas!

Our hosts this month, Barbara of Barbara Bakes and Bunnee of Anna+Food have chosen a delicious Stacked Green Chile & Grilled Chicken Enchilada recipe in celebration of Cinco de Mayo! The recipe, featuring a homemade enchilada sauce was found on www.finecooking.com and written by Robb Walsh.

 ~

I'm glad to get back into the swing of things with Daring Cooks.  I was kind of bummed that I missed out on last month's challenge because of all the craziness that has been going on in my life.  Anyways, I really enjoyed this challenge, and appreciated all the room for creativity.  


The mandatory part of this challenge was to make a homemade Mexican-style sauce for enchiladas.  I know my mom has a few great enchilada recipes, so I asked her to send them to me.  I based my enchiladas on one of her recipes, which focused on a tomato and spice based sauce.

Chicken and Cheese Enchiladas


For chicken:
2 large chicken breast halves
2 cups chicken stock
1 cup water
1 clove minced garlic
1 bay leaf
1/2 an onion, finely chopped
1 jalapeno pepper, minced
1/2 a serrano pepper, minced
1/2 tablespoon olive oil
2 thinly sliced green onions
1/4 cup chopped fresh cilantro
1/2 teaspoon oregano
salt and pepper to taste

For sauce:
2 tablespoons oil
3 cloves minced garlic
3 tablespoons chili powder
3 tablespoons flour
1 tablespoon cumin
1/8 teaspoon cinnamon
1/3 cup tomato sauce

To assemble:
10-12 6-inch corn tortillas
3/4 cup grated sharp cheddar cheese
sour cream and cilantro for garnish

~

For chicken:
Arrange chicken in heavy medium saucepan.  Add stock, water, garlic, and bay leaf.  Bring to boil.


Reduce heat, cover, and simmer until chicken is cooked through.  Transfer to bowl using slotted spoon and cool.  Discard bay leaf.  Reserve liquid.

In the meantime, heat oil in a small pan and saute onions and peppers until slightly softened and aromatic.


Peel skin off chicken and remove meat from bones.  Tear meat into bite size strips.  Place in a large bowl.  Mix in green onions, cilantro, pepper and onion mixture, and oregano. Add salt and pepper to taste.

 
For sauce:
Heat 2 tablespoons oil in medium saucepan over medium-high heat.  Add 3 minced garlic cloves and saute 30 seconds.  Add chili powder and saute 1 minute.  Add flour, cumin, and cinnamon and stir 1 minute (mixture will be dry). This seemed like a lot of spice to me, but it ended up tasting great.  Don't use less! 


Whisk in 1 cup reserved poaching liquid.


Add remaining poaching liquid and tomato sauce.


Cook until thick and smooth, whisking frequently, about 5 minutes.  Adjust seasonings.  I added a dash of Sriracha chili sauce.  I think a splash of strong coffee would have done the sauce justice, but I didn't have any brewed so I skipped it.  Next time, though.

Cool slightly before assembling. 

To assemble:
Lightly oil a 13x9x2" baking dish.  Heat heavy medium skillet over high heat until hot.  Add 1 tortilla and cook until heated through, turning frequently.  Using tongs, dip into sauce, coating both sides.


Spoon about 3 tablespoons of chicken filling into the tortilla and roll.  Repeat.  (Can be prepared one day ahead- cover with foil).

 
Spoon any remaining sauce over.  Sprinkle with cheese.  
 
 
Cover with foil.  Position rack in top third of oven and preheat to 425.  Bake enchiladas 10 minutes.  Uncover and bake until hot and bubbling, about 10 more minutes.
 
 
And that's it!  These were delicious and easy, despite the seemingly long amount of steps.  They would be great to make ahead and throw in the oven after a long day at work.  
 
 
I served mine with some spicy red rice, sliced avocado, and sour cream, and cilantro.  These would be great with a margarita, but I thought a couple Modelos with a bit of salt and lime were perfect.


Saturday, May 8, 2010

Biscuits & Gravy

So, after a long hiatus, I'm finally back! I promise I'm going to post with a little more regularity, it's just been a whirlwind month for me.  Thanks to my little group of loyal readers who are bearing with me and have patiently waited for this phase of my life to pass.

I'm done with my first semester of culinary school! With all A's to show for it!  It did get a little hairy there towards the end, but I still feel really good about my decision to start [and stick to] this program.

~

For my first post in a while, I decided to make biscuits and gravy.  I've been eating a lot of comfort food lately, which is definitely the opposite of what I should be doing at the start of bikini season here in beautiful Charleston, SC.  Regardless, I'm doing it anyways, so I figure I might as well post about it.


This could even be a nice breakfast to make your mom or your wife or whomever you deem appropriate on Mother's Day.  If you're not working brunch, that is. Which I am doing, along with everyone else I know, considering nearly everyone else I know is a Food & Bev kid.

I guess some [not southern] people have a hard time understanding the concept of biscuits and gravy.   I'm always appalled when people have never heard of, or tasted, biscuits and gravy for breakfast.  It's in that same category as grits.  It's surprising how many people are like "What are grits?" when I'm waiting tables. It's a pretty difficult concept for me to grasp.  I mean, my sister and I were spoonfed this stuff as kids.  But I digress.

I made buttermilk biscuits by scratch, but they didn't turn out remarkably well.  I actually threw out the first batch of dough because it just wasn't right, and the second batch still didn't turn out as fluffy and nice as I wanted it to.  So, I'm leaving the biscuit recipe out of the equation.  Here is my favorite recipe for country gravy, which is based on a recipe I found on allrecipes.com.

Country Sausage Gravy

 
1 pound pork sausage (I used less than a pound, and threw in a hot bratwurst I had leftover from a pool day this week)
3/4 onion, finely chopped
3/4 bell pepper, finely chopped
1 jalapeno, seeded, minced
1/2 teaspoon crushed red pepper
1/2 teaspoon chili powder
2 tablespoons garlic, minced
4 tablespoons unsalted butter
S&P to taste
4 tablespoons all-purpose flour
1 teaspoon minced fresh thyme
2 cups milk, divided
chicken stock, to taste
white wine, to taste
1/4 cup minced fresh parsley

In a skillet on medium heat cook pork, onion, peppers, red pepper, chili powder, and garlic.


Cool until pork is crumbly.  Drain off excess fat, leaving a small amount.

Combine butter, salt, and pepper with the meat mixture and stir until the butter melts.  Slowly sift flour over the top.  Mix gently and allow mixture to cook for 5 minutes.  Be careful not to let it burn.  Don't forget to scrape the bottom of the pan.  Add the thyme.


Slowly stir in milk, about a half cup at a time, and incorporate it well. when the mixture thickens, add more milk.  Do not let it boil vigorously, or it will burn.


Add a splash of chicken stock and white wine to taste.  I thought this added flavor and a hint of acid, which this heavy gravy needed.  If it thickens too much, add more milk.  Adjust the taste with more salt and pepper as needed.

Just before serving, add the parsley, and about 1/4 cup more milk; the gravy will thicken quickly as it cools.


Apparently, the leftover gravy develops more flavor if you let it refrigerate overnight. Obviously, I had leftovers, so I'm curious to see what happens.  All I know is that this recipe is easy and delicious.


Happy early Mother's Day!

Wednesday, April 28, 2010

Biding Time

Sooo, again, I'm apologizing for not posting in a while.  I'm kinda in the middle of a housing crisis - my apartment flooded with sewage on Friday, along with 7 others on the bottom floor of my unit. Right now, I'm staying in a hotel down the road while all this stuff gets taken care of.  Needless to say, I'm not doing much cooking because my place is in shambles, and I don't have daily access to a computer. So, bear with me, hopefully this will all be resolved in a few days. <3<3<3

Tuesday, April 20, 2010

Culinary School Update: End of semester wrap up

So, I have to start this post by telling everyone how incredibly sorry I am for waiting so long to post again!  It has been a long, rough, past few weeks, so again, I have to apologize for how I've fallen off with the blog.

That being said, I owe you guys a culinary school update. Its the end of the semester, and I have exams all week long. I can't believe my first semester is already almost over!  But I do want to pick up where I left off with the school updates.

A couple weeks ago, we played with fresh pasta dough in cooking class.  First, we made ravioli with mushroom duxelles.


Then, we made fettuccine alfredo.


We also made orzo with creamed leeks.


~

We didn't have baking class that week, so I'm moving on to the following week. The next cooking class we had, we worked on grains.  We were really busy that week. 

We made grits,


risotto,


fried polenta, 


and red beans and rice.


 ~

The past couple weeks in baking class, we've been decorating the sponge cakes we baked a while back.  They were frozen immediately after we baked them.  Here is the chiffon sponge with oreo whipped cream frosting that we decorated 2 weeks ago:


Last week, we decorated the walnut genoise cake. We made a Swiss buttercream icing to go with it.  This was really hard to decorate!  The meticulous, nit-picky side of me struggled with trying to perfect the cake, but I really enjoyed the process.


Cross section: the bottom layer was spread with raspberry jam.  I loved this cake- the ground walnuts added a nice texture to the cake.


~

Finally, we had breakfast week in cooking class.  I didn't really think anything was photo-worthy except the eggs benedict I made.  Obviously, we didn't have any Canadian bacon, so I just used regular bacon. I wanted to practice making hollandaise sauce because its on the final next Monday.


Whew! That was a lot of catching up to do! So, I'm off to my baking final to make pate a choux. Wish me luck!

Saturday, April 10, 2010

Roast Chicken with Herb Butter and Veggies


A while ago, I randomly bought a whole chicken because it was dirt cheap at the Teeter.  I put it in the freezer, where it stayed until a few weeks ago when I decided I wanted to roast it.  I haven't posted about it yet because I've had so much other stuff to post about, but I figured I needed to go ahead and write about it now since its kind of a winter-y recipe and spring is all of a sudden upon us. 

I looked at a whole bunch of recipes and techniques for roasting chickens, and decided to kind of blend a bunch of techniques.  To start with, I made a butter with lemon zest, garlic, and rosemary, and spread it under the skin.  I stuffed the cavity with half an onion, half a lemon, and some rosemary sprigs.  I decided to truss it because so many people said it helps the chicken cook more evenly.

Interestingly enough, I also found out that some people swear by preheating the roasting pan with the oven.  This helps the thighs get a head start, which keeps them from being underdone when the breast is ready to come out.  So, I decided to give it a try, and preheated the pan in a  425 degree oven.  When it was ready, in went the chicken.

The skin was kind of torn, so that pin is kind of holding it in place. My mom taught me this trick.

In the meantime, I got the veggies ready by cutting them all down to about the same size. I decided to go with fennel, carrots, pearl onions, potatoes, and whole garlic cloves.  I lightly tossed them in some EVO, salt, and pepper.

 
After about 20 minutes at 425, I took the chicken out, laid the veggies down (yes, I used a rack), and replaced the chicken. Turned the temperature down to about 375, and added some more butter on top.


I roasted the chicken about another hour ( I can't remember exactly how much time it took).  Don't forget to baste periodically.  I also turned the pan around halfway through the cooking time to make sure it cooked evenly.  When a thermometer inserted into the thickest part of the thigh registers 165 degrees, or when the juices run out clear instead of cloudy, the chicken is done. 


Transfer the chicken to a cutting board and let it rest 10 -15 minutes before carving. 


Although the veggies were done, I thought they needed to brown a bit more, so I put them in a Pyrex dish and put them under the broiler for a minute or two.


I made a quick, easy gravy with the pan juices, and sauteed some blanched broccoli rabe with some garlic and lemon juice, and that's it!


Thursday, April 1, 2010

Blood Orange Polenta Upside-Down Cake


This recipe caught my eye as soon as I saw the photo in the March '10 issue of Bon Appetit magazine.  It was one of those recipes that I immediately knew I would have to make. The oranges were just so striking, and polenta is one of my favorite things to eat.  What's not to like?


Make sure you slice the oranges as thin as possible.  I talked to my Bakeshop Production chef after I made it, and he suggested using a mandolin.  The flavor of the cake was amazing, but the peels were still a bit overwhelming on the palate.  I think if you cooked the slices with the simple syrup for even just a minute or two, rather than just laying them in the already cooked syrup, it might help candy the peels and take a bit more of the bitterness out.  That being said, here is the recipe:

Blood Orange Polenta Upside-Down Cake
From Bon Appetit, March 2010

7 tablespoons sugar, divided, plus 3/4 cup sugar
3 tablespoons water
8 tablespoons (1 stick) unsalted butter, room temp, divided
3 unpeeled small to medium blood oranges
3/4 cup plus 3 tablespoons all-purpose flour
3 tablespoons polenta or coarse yellow cornmeal (preferably stone-ground)
1 1/2 teaspoons baking powder
1/4 teaspoon coarse kosher salt
3/4 teaspoon vanilla extract
2 large eggs, separated
6 tablespoons whole milk

Position rack in center of oven and preheat to 350 degrees F.  Combine 6 tablespoons sugar and 3 tablespoons water in a 10-inch diameter ovenproof skillet with an 8 inch diameter bottom and 2 1/2 inch sides *my trusty cast-iron skillet worked beautifully for this cake*.  Stir over medium heat until sugar dissolves.  Increase heat and boil wihout stirring until syrup is golden amber (not dark amber), occasionally brushing down sides of skillet with wet pastry brush and swirling skillet, about 4 minutes.  Remove skillet from heat and whisk 2 tablespoons butter into caramel. Set aside.

I think I could have cooked my syrup a bit longer.  This is also where I probably would have added my orange slices. 
I'm thinking all this could have been done in a separate pan, and then laid in the cast iron skillet afterwards.

Cut off both rounded ends of each orange so that ends are even and flat.  Using sharp knife *or mandolin,* cut oranges into 1/16 to 1/8 inch rounds.  Remove and discard any seeds.  


Arrange orange slices, overlapping slightly, in concentric circles atop caramel in bottom of skillet.

I also would eliminate that center circle of oranges you see on top here.  
You really only want one total layer of oranges, with maybe a very slight overlap. 

Whisk flour, polenta, baking powder, and coarse kosher salt in medium bowl to blend.  Using electric mixer, beat 3/4 cup sugar, remaining 6 tablespoons room-temperature butter, and vanilla in another medium bowl until light and fluffy.  Add egg  yolks 1 at a time, beating well after each addition.  Add flour mixture in 3 addtions alternately with milk in 2 additions, beating batter until just incorporated.

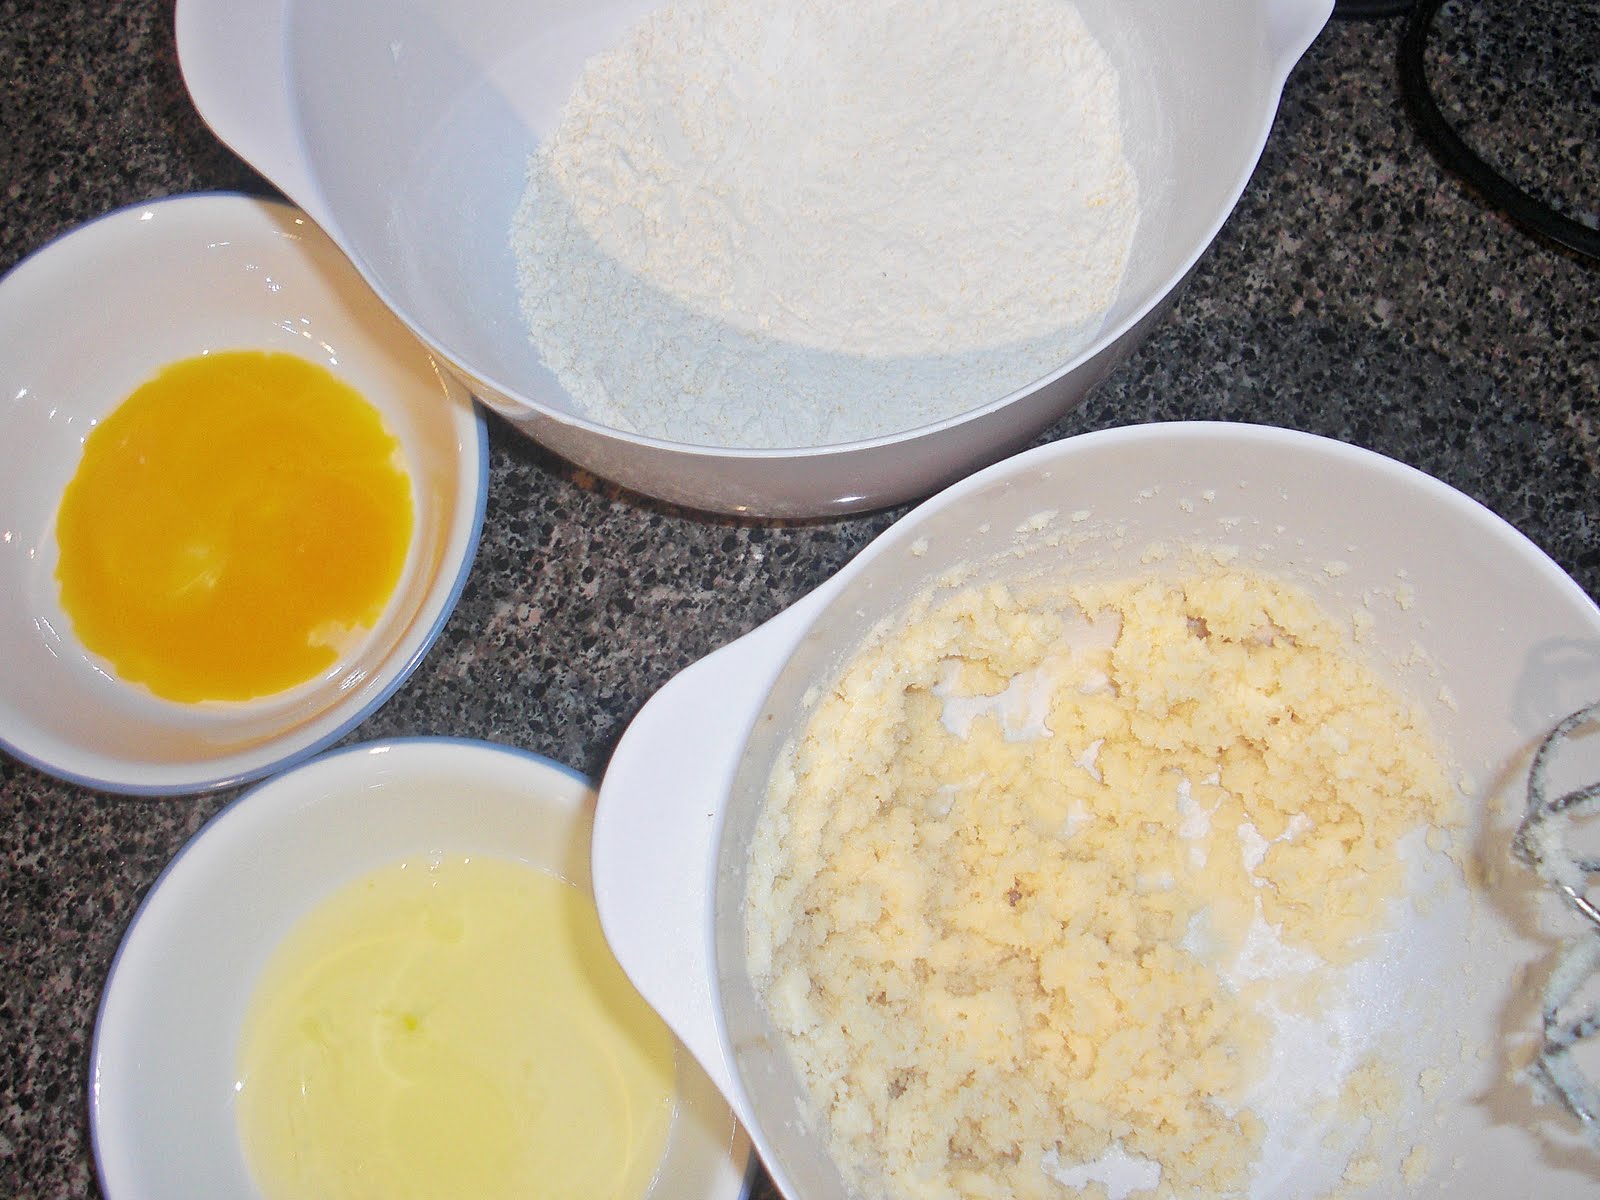
Clockwise from top: flour/polenta mixture, butter/sugar mixture, whites, yolks

Using clean dry beaters, beat egg whites in a large bowl until soft peaks form.  Add remaining 1 tablespoons ugar and beat until stiff but not dry.  Fold 1/3 of egg whites into batter to lighten, then fold in remaining egg whites in 2 additions.

  whipped whites and polenta cake batter

Drop batter by large spoonfuls atop orange slices in skillet, then spread evenly.

You don't want to pour the batter because you might disturb the arrangement of the orange slices.

Bake cake until tester inserted into center comes out clean, about 45 minutes.  *I underbaked this by 5 minutes, and I think I could have taken it out even a few minutes earlier than that.  It would have been pretty dry had I left it in the full amount of time.  This could also just be my oven...*

Run small knife around cake to loosen.  Place platter atop skillet.  Using oven mitts, hold platter and skillet firmly together and invert, allowing cake to settle onto platter.  Rearrange any orange slices that may have become dislodged.  Cool completely at room temperature and serve with whipped creme fraiche (or whipped cream).


So ultimately, this recipe turned out pretty well, with some room for improvement.  I think if I made it again with these slight changes, it would turn out perfectly. 


This cake is a good one to have up your sleeve because it's stunningly beautiful, but not that hard to make.